


In music production, it’s the tiny details that add up into making a colossal hit. All the small nuances of the equipment, routing, recording method, and mixing technique stack to produce the iconic music you all want to create.
So, hone into the minute details, and you’ll be able to produce the filthiest, dopest bangarang beat. AKA great, high-fidelity audio that’s brilliantly mixed. We’ll explore many subtle audio tactics in the 13 secret music production tips down below. It’s these little but crucial things that’ll make all the difference in your production.
12 Music Production Tips
1. Mix Like a Producer, Not Like a DJ
First of our music production tips is to mix like a producer and not like a DJ. is Mixing as a DJ and mixing as a producer are two different animals. Here’s how they stack up:
Like a DJ:
- A DJ works with fewer fully-produced audio elements.
- A DJ mixes in shorter segments; mixes a portion & cues it live, then repeats the process.
- Audio elements have extreme amplitudes – perfect for live performances.
- Mixing lasts until the set is over.
Like a Music Producer:
- has many raw audio elements that need to be individually, meticulously adjusted to fit in.
- Each audio element needs tiny adjustments in amplitude and sonic features.
- Songs must be mixed from beginning to end.
- The time invested in just one song equivalates to hours of work composing and mixing.
If you are coming into music production as a DJ, you’ll be able to transition pretty quickly. There’s a lot you’ll be able to crossover – like effects, beatmatching, and rolls. Just know, you’ll have to change up your tactic & put in the man-hours to mix a song to perfection. Stick with these music production tips and you’ll be fine! Let’s continue…
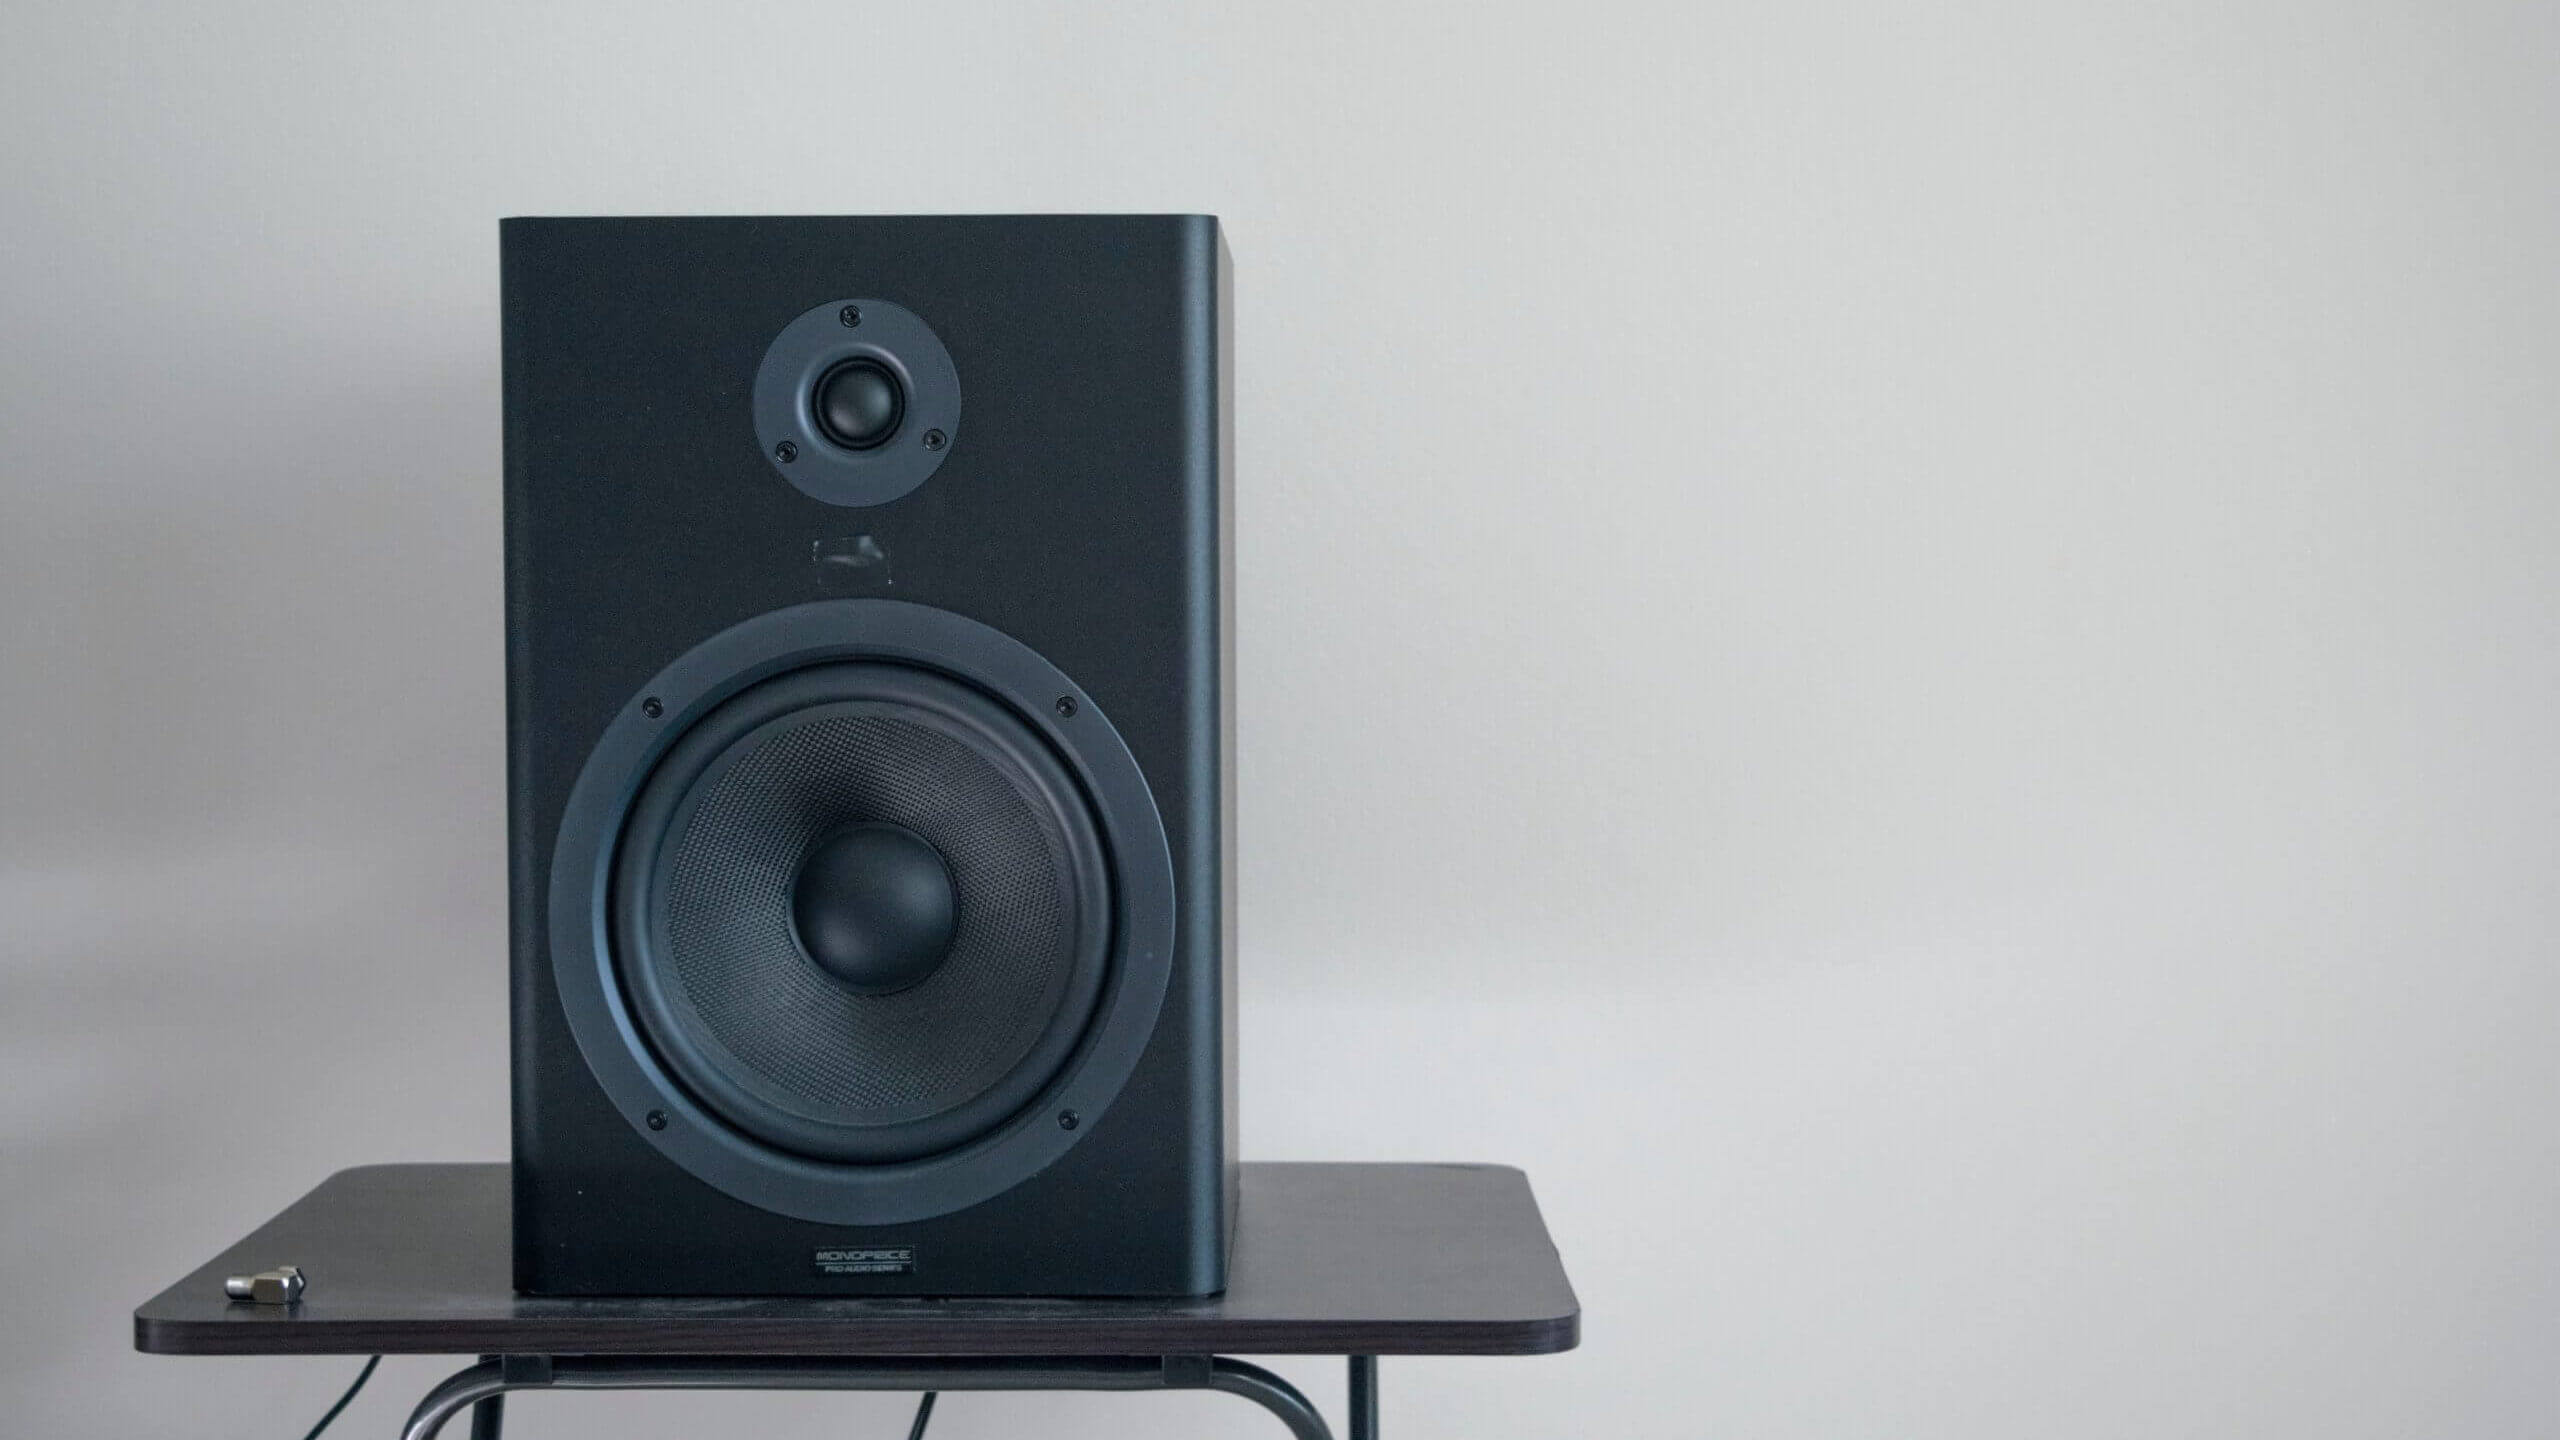
2. Mix on Studio Monitors, Listen on Consumer Speakers
Number 2 of our music production tips is to mix on studio monitors and then listen back on consumer speakers. A lot of new producers mix on whatever gear they’ve got on hand. Probable some speakers that they’ve been listening to for years. This is doing it dirty.
If you want to improve in the production world, you’ll need to get particular about the speakers you are using.
Getting a separate set of speakers for production may seem trivial, BUT IT’S the farthest thing.
How speakers represent your raw audio will determine how you’ll mix. Many speakers are for listening consumption only, with added bass, treble, and filters tuning the sound. If you mix on consumer speakers, the music will inherit sonic adjustments designed into the speakers.
Studio monitors, on the other hand, are tuned with a ‘flattened’ sound. So, you hear the audio in its most realistic nature, which you want for mixing.
Consumer speakers are useful for testing out the finalized song. Once you’ve completed the mix, listen to the track on all sorts of speakers to get a feel for how everyday people will hear it.
If you hear something you want to change, then, by all means, get into the DAW, tweak the mix, and repeat the process.
3. Pick the Perfect Studio Speaker
Number three on our producers tips list is to always try and pick the right studio speaker. Studio speakers have a dimension and power that can knock the listener into a different dimension. There is a range of studio monitors, from cheaper to gut-punching expensive.
The technology inside gets sophisticated; the higher up you go. So, how do you choose decent mixing monitors that match your needs/budget? Here’s something to keep in mind while purchasing speakers for production.
Don’t Buy on Price, Buy on Sound
While studio monitors should output a flat frequency response, every manufacturer or model will have a different sound. There’s no standard for sound replication.
All the different components inside the speaker will change the audio’s character—the type of material used in construction affects sonic features. Then you get into acoustics and design … but let’s not fall down that rabbit hole.
Speaker prices may reflect the quality of components & construction, but that doesn’t necessarily mean it produces better sound PER SAY.
I’m sure you’re familiar with the age-old saying,
“beauty is in the eye of the beholder?”
Well for an audiophile it goes,
“sonics are interpreted by the listener.”
The listener determines the audio quality for themselves. Listen to the studio speakers and buy them if you like how they sound. Whether they cost $100 or $10,000 if you think they output the most real audio for producing, then use them. I’ve always loved mixing on Yamaha studio monitors. Yamaha speakers produce a flatter sound compared to other brands. If you mix on a pair of Yamaha MSP monitors, the tracks you create will sound incredible through any speaker!
4. Know Sample Rate & Bit Depth
The fourth of our music production tips is to understand sample rate and bit depth. The sample rate & bit depth defines digital audio fidelity. If you have a good grasp of each one, you’ll be able to achieve the highest resolution sound out of your tracks.
Sample Rate
An analog wave is transmitted to a computer by a series of digital snapshots, called samples. The Sample Rate is the amount of captured samples per second, measured in kilohertz (kHz). The higher the sample rate, the better the sound resolution.
The typical sample rate for most songs is 44.1 (44,100) kHz, which can capture up to 22,000 Hz of analog sound. Normal human hearing spans up to 20,000, but a high sample rate will capture rich super-sonic frequencies.
Bumping up the recording session sample rate to 96 or even 192 kHz sample rate means capturing all harmonic frequencies that might add fidelity to the music.
If you create a session with a 44.1 kHz sample rate, you are limiting your options when it comes time to bounce your mix.
As a music producer, I always use a high sample rate for recording and bouncing.
Bit Depth
The sample rate transmits in a binary signal sent to the computer. The computer uses a series of 1’s and 0’s to interpret the digital audio signal. The bit depth is the number of binary letters used in the music’s digital signal. The more binary letters, the more audio resolution the computer interprets.
CDs were standard 16-bit bit depth, but nowadays, most audio sources are 24-bit. Always set your recording session and bounce settings to 24-bit bit depth.
5. Get a Decent Audio Interface
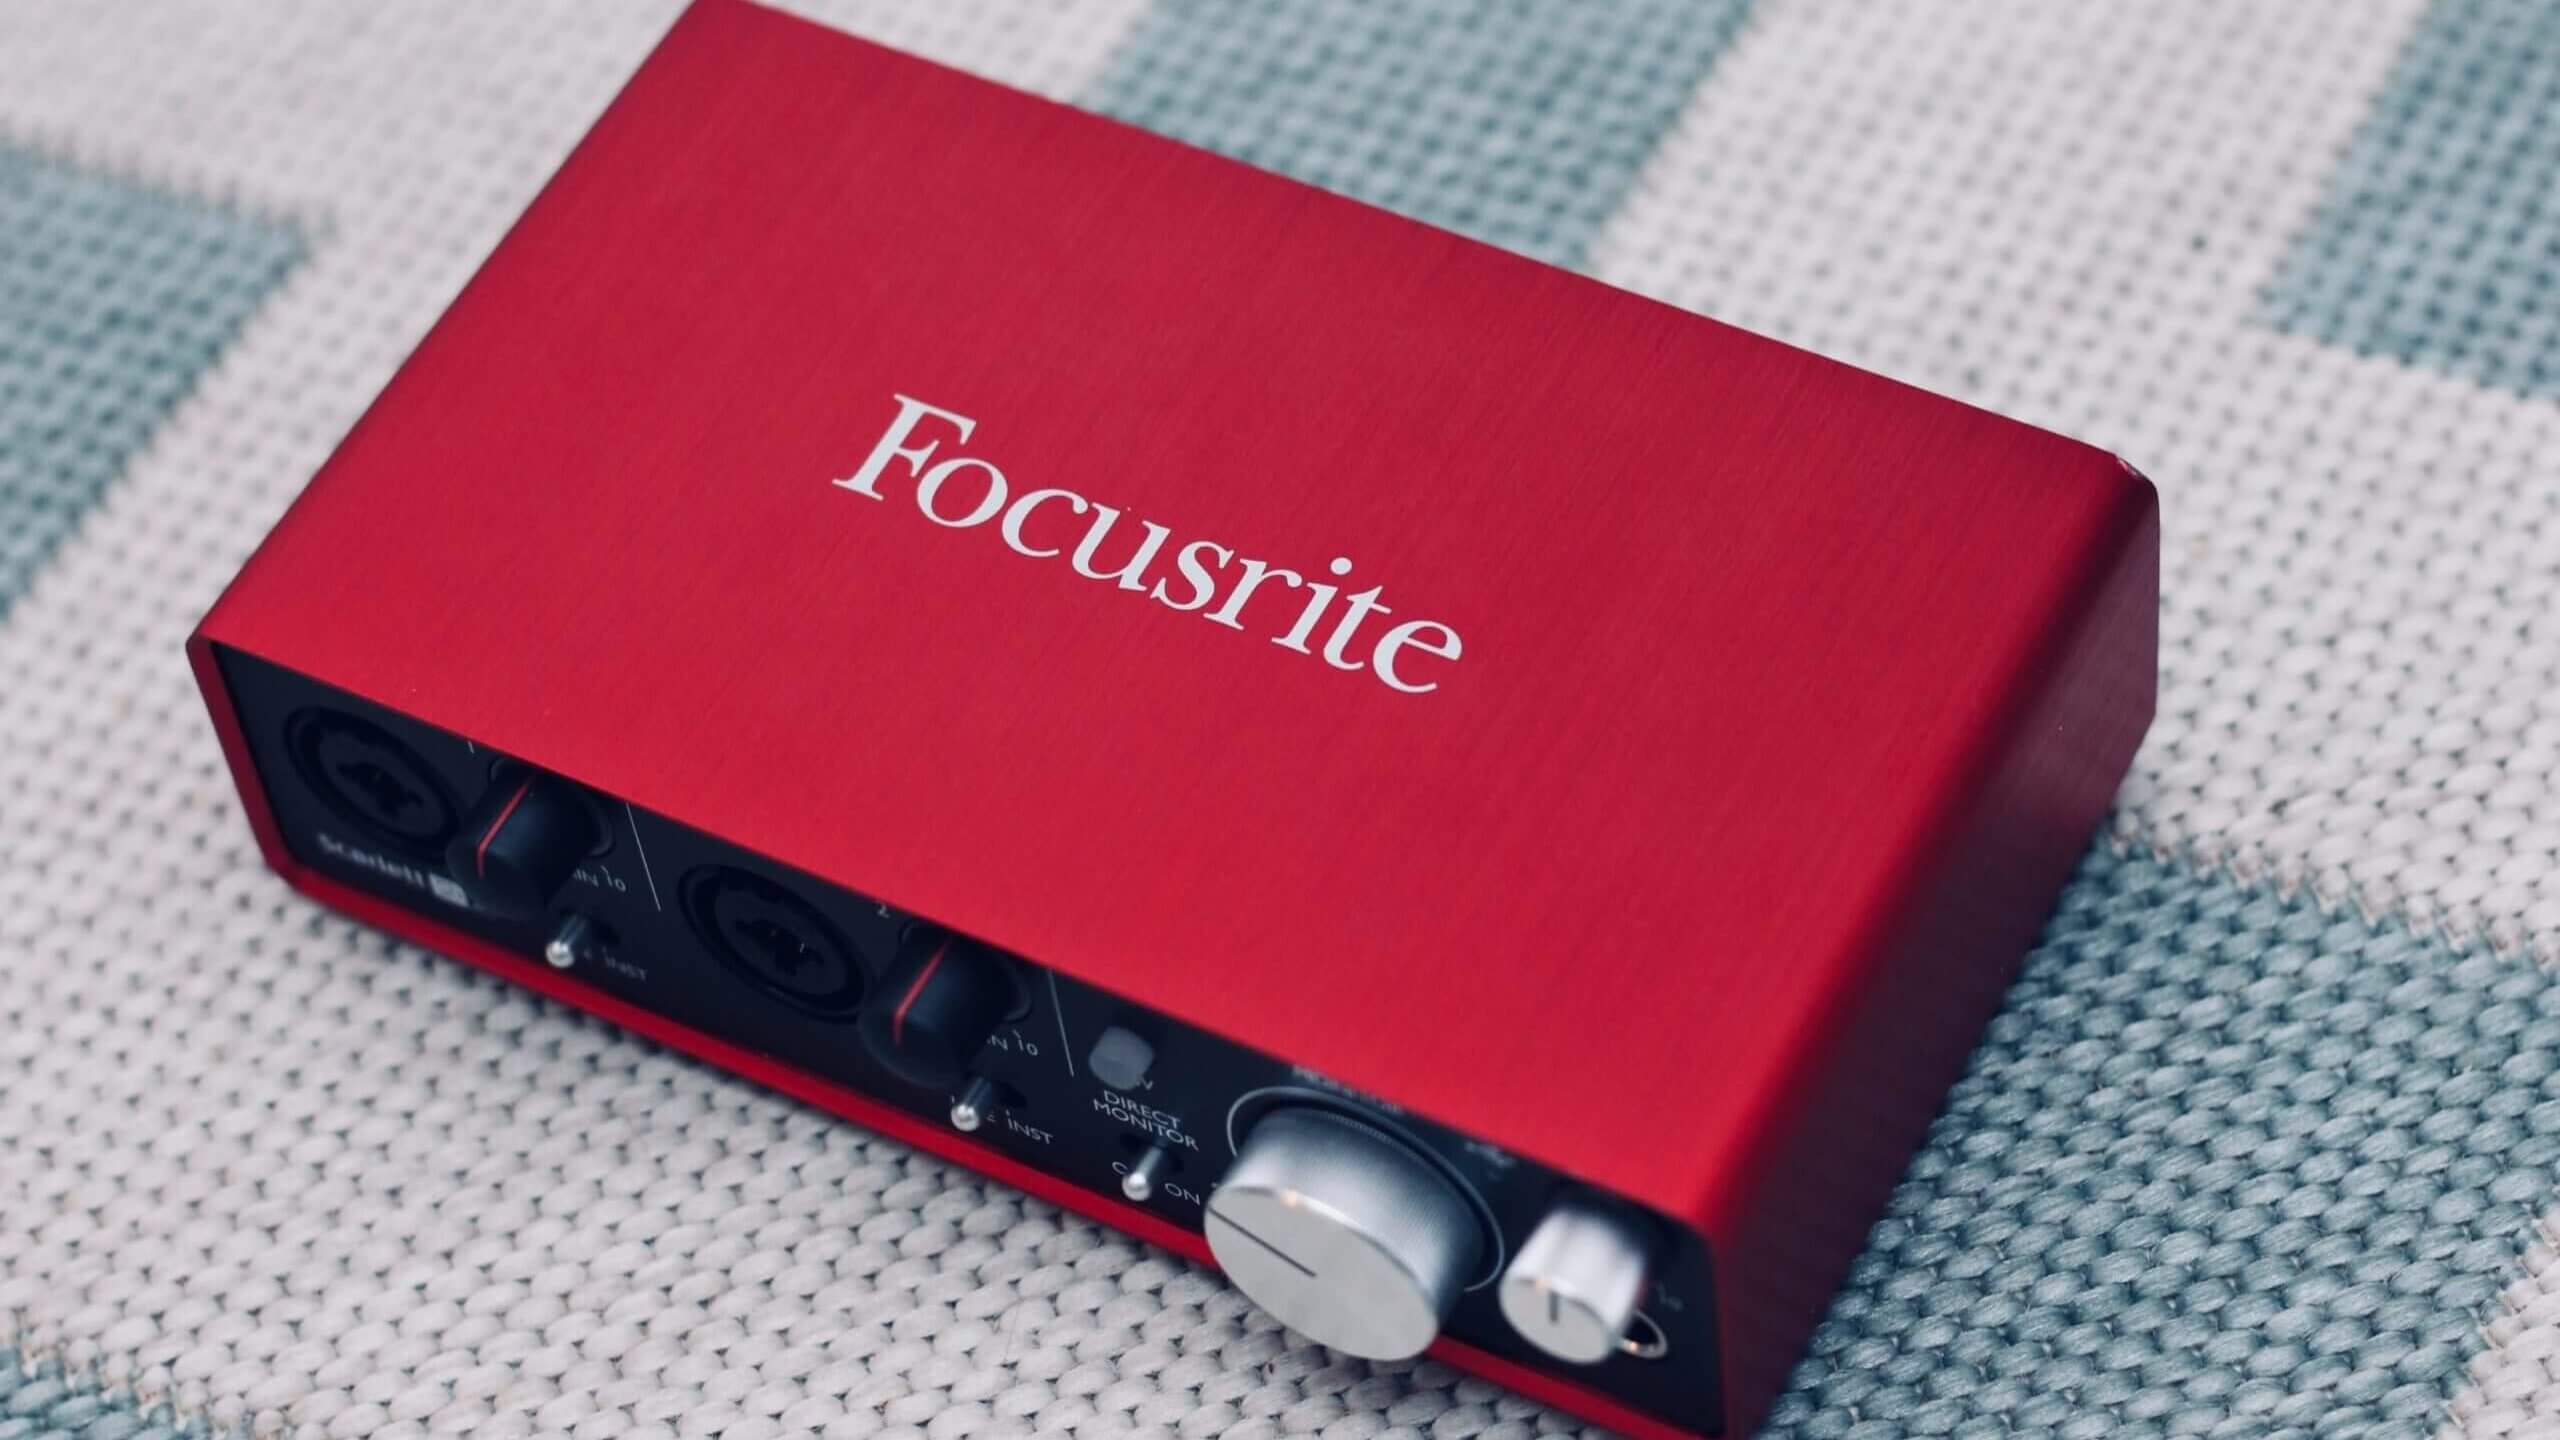
An audio interface is a USB box that sends multiple sources of audio into one digital signal. Getting an excellent USB audio interface is crucial for producing high fidelity music.
Audio interfaces allow you to record vocalists, instruments, and even MIDI straight into a DAW. Unless you’re only using MIDI, an audio interface unlocks all the analog music sources you may use in your composition.
A USB audio interface determines the digital recording quality from analog audio. Standard audio interfaces have sub-par circuitry, with a basic sample rate and bit depth. Superior models have componentry that elevates the sound, with a higher sample rate & bit depth.
An audio interface may also be referred to as a microphone pre-amp. There are pre-amplifiers built into an audio interface that boost a mic signal to a line-level signal. Pre-amps also shape the quality of the sound. Better pre-amps mean that the recorded sound from the microphone is better too.
Getting a reputable 2-channel interface is ideal for most. If you are recording many audio elements at once, like a drum kit, you might need a 4-channel to 8-channel interface.
Focusrite is a manufacturer known for its superlative pre-amps. Check out their Scarlet 2i2 as a phenomenal, competitively priced, 2-channel interface. For music producers that like to record multiple instruments simultaneously, the M-Track Eight will serve your purposes well.
Music production tips number five is to pair the microphone to individual instruments.Every microphone has a different sound profile – it’s referred to as a microphone frequency response. Some microphones make specific instruments sound better than others. Think of it like pairing wines with different foods. Certain wines accentuate the flavors in food. Well, particular microphones accentuate frequencies in analog instruments.
If you know which microphone to pair with which instrument, then you are an elite music producer. Your tracks will come out sounding better than everyone else, and people will be poking their heads into your production process to figure out why.
Some ill-advised music engineers/producers use one microphone for everything. If that’s you, I’m shaking my head in disappointment. I get it, cash is tight, and microphones are expensive. I 100% feel you, but plan on ramping up your microphone collection when your money is right.
You should design your microphone collection around what instrument you consistently use. I’ll go over some mic/instrument pairings so that you can get started:
Vocals
- Shure SM7B – Mid-to-low frequency range vocalists
- Sennheiser MD421 – Mid-heavy frequency range vocalists
- Neumann TL102 – Mid-to-high frequency range vocalists
Acoustic Guitar
- Rode NT2A
- AKA C414
- Shure SM-57
Drums
- Shure SM-57 (Snare)
- Shure SM7B (Kick)
- Rode – NT5 (Cymbals)
- Sennheiser – MD421 (Toms)
Amps
- Sennheiser e609
- AKA C414
6. Learn a DAW like the Back of Your Hand
I’ll admit it; I did this one wrong and wasn’t aware of this important production tip. I started learning on Pro-Tools, then I shifted gears into Reason for MIDI, then onto Logic, and now I’ve been using Abelton Live. I was on the hunt for “the best” DAW. It’s been great to sample each one out, but now I’m piss poor at navigating any of them.
It takes a while to get the process flow down. The more you work in one DAW, the quicker and easier mixing becomes. The information needed to Familiarize yourself with a DAW fills semesters of classes. You’ll move in between so many plugins and windows; it’ll make your head start to spin.
It gets incredibly complex, applying settings and changing parameters on a massive number of tracks. Recording is either a challenge or effortless, depending on how well you operate the DAW.
Did I make my point clear? Do yourself a favor, find a DAW that you like and stick with it. Here are some steps to master your DAW:
- Analyze all the preferences and understand each one.
- Get to know the Mix and Edit window thoroughly.
- Watch tutorials on the transport and recording modes.
- Go through and try out all the stock inserts (AKA, plugins) to figure out what they do & which ones you like.
- Master the MIDI sequencer and quantization features.
7. Hot Keys & Keyboard Shortcuts
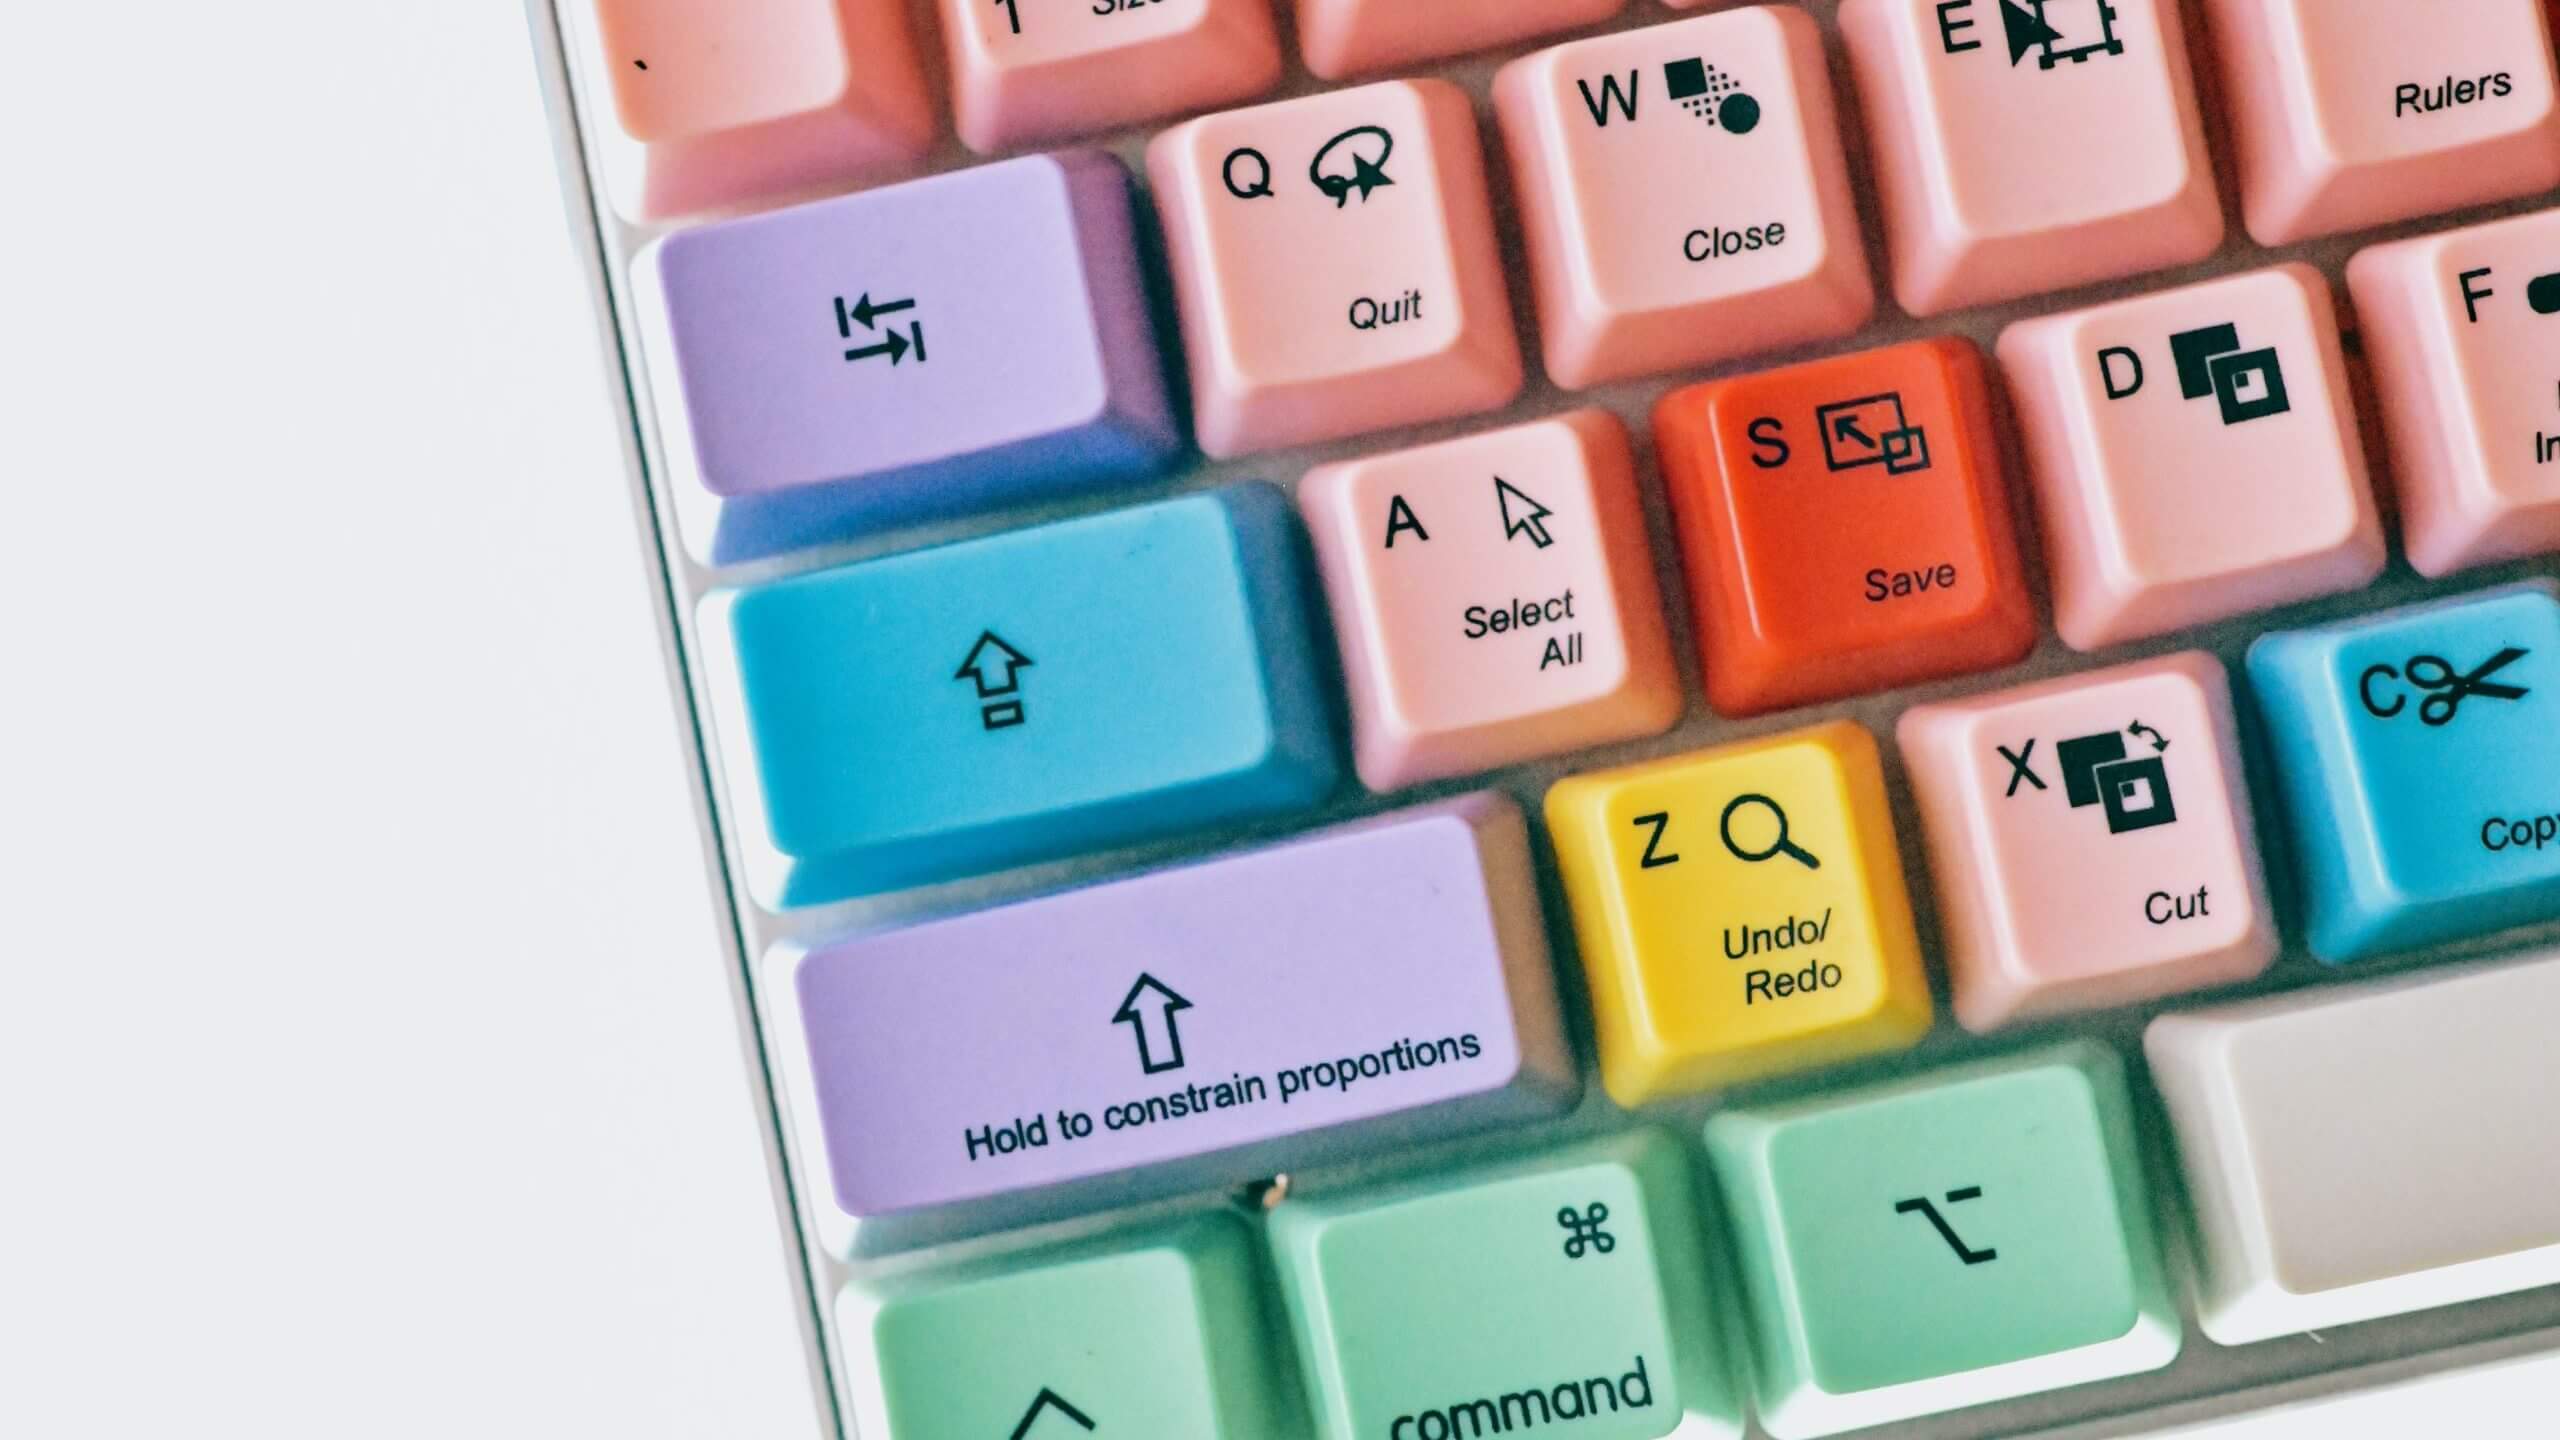
Number seven on our music production tips hit list is to learn hot keys and keyboard shortcuts. This section could go in the same division as learning your DAW, but I’ve decided to put it alone. That’s how vital hotkeys are in music production.
Assigning, learning, and using the keyboard shortcuts in the DAW can tremendously speed up your production flow. They allow you to maneuver, access intuitively and change settings or processes.
You don’t need to remember all of them. Find the commands with hotkeys you use most often. Depending on which DAW you use, there are keyboard skins that will help you remember keyboard shortcuts, with color-coded shortcuts on every key on the keyboard.
Each DAW has an exhaustive list of keyboard shortcuts you can find online. For example, here is the keyboard shortcut list for Abelton Live.
Go through all the DAW’s keyboard shortcuts and compile a list of 5 to 10 you want to use initially. Here are a few commands we think you should learn in Abelton Live:
| Command | Mac | Windows |
|---|---|---|
| Search in Browser | CTRL – F | CTRL – F |
| Play from Start Marker/Stop | Space | Space |
| Continue Play from Stop Point | Shift – Space | Shift – Space |
| Record | F9 | F9 |
| Nudge Loop Left/Right | Right & Left Arrow Keys | Right & Left Arrow Keys |
| Shorten/Lengthen Loop | CTRL – Right & Left Arrow Keys | CMD – Right & Left Arrow Keys |
| Select All Clips/Slots | CTRL – A | CTRL – A |
| Split Clip at Selection | CTRL – E | CMD – E |
| Create Fade/Crossfade | CTRL – ATL – F | CMD – ALT – F |
| Pan Left/Right of Selection | CTRL – ALT | CMD – ALT |
8. For God’s Sake, Use a Click Track
Music production tips numero 8 is serious stuff! If you don’t use a click track during your production, you’ll go through huge hurtles to get the mix right. You might even have to scrap the entire session and start from scratch. Using a click track is make-it-or-break-it in music production.
It’s Crucial to Keep Everything On-Beat
All the track’s musical elements must maintain the same tempo throughout the entire song. If any part strays from the tempo, then the music will become offbeat, and you’ll hate how it sounds.
Keeping the same tempo seems simple in theory. The problem is that performances sometimes speed up or slow down depending on the track’s flow and style.
You won’t even realize that you’ve performed a melody slightly offbeat until you play it back. It’s a slippery slope that could lead to disaster. If you’ve recorded a central melody that’s offbeat and have built all other parts around it, you’ll have to time adjust parts if you can or redo everything.
It’ll Improve Your Skills
Serious musicians practice to a metronome because it hones their performance skills. Play long enough to a metronome, in this case, a click track, and you’ll be an absolute musical pro.
It’s natural to play a tad slow or fast. Playing to a click track breads the timing-error out of you. So, you can eventually play on-beat and not even think about it.
9. Lowering Amplitude : Boosting Amplitude
Music production tips number 9 is all about amplitudes! A song is a perfectly balanced mix of elements. That balance requires all parts to come together without breaking through the sound headroom. If the mix breaks beyond a certain amplitude point, you’ll get distortion, which ruins your music.
The mix has a nominal signal level – a top out point for the mix’s amplitude. The headroom is there for sporadic spikes and sudden peaks in the mix (an accentuated snare hit, for example). Too many audio elements set at high amplitudes will break beyond the nominal signal level and create distortion.
Some mixes can contain 10, 20, 30, or more tracks. There is only so much dynamic range space for all the audio elements. There isn’t enough sonic room to set every audio track at the same amplitude.
As a DJ, you are probably more inclined to increase the volume on an audio element if it isn’t loud enough. As a music producer, you’ll have to bring down one or more audio elements so others can fit into the mix better.
This is counter-intuitive in some ways. Naturally, if something seems low in amplitude, you bring it up. The digital audio realm is entirely different.
This doesn’t always hold true. There will be plenty of times where you bring the amplitude on a track up. If it still isn’t sitting right in the mix, lower one or more elements slightly down and see if that fixes it.
10. Pick a Unique Set of VSTs/Samples
A big one for our music production tips is to be careful picking your samples and VSTs. If many people recognize the inserts and virtual instruments you use for composing the music, it will take the wind right out of your sails.
I’m not saying you have to be some snotty-nosed producer that needs things that no one else has, but there’s something to be said about having the element of astonishment and mystery behind your production.
Going out and finding unique samples and plugins is like searching for your distinct style that you’ll infuse into the music. Stock virtual instruments in DAWs are great, don’t get me wrong, but they get heavy use in many productions.
Everybody loves Free.99. Find the exclusive sounds if you want to break out on the music scene – even if that means you have to shell out a few coins to get the best of the best. You are in luck because there are heaps of options for music producers. Check out Time+Space’s website and take a listen to their excellent collection of virtual instruments and samples.
11. Use Analog & Digital Instruments
Number 11 of our music production tips is to use both analog and digital instruments. Some producers strictly use virtual instruments and samples. You can compose some awesome music using digital assets, but tracks that include some analog devices are the heavy-hitters.
Virtual instruments can’t replace all the sonic traits of their analog counterpart. Things like Timbre, attack, and vibrato all get lost in translation, as the computer interprets the digital signal into an audio waveform.
It’s tricky finding the balance between analog & digital instruments for your composition. It takes time & experimentation to find the perfect blend between the two.
Every song will have a different combo of analog vs. digital, but here are some elements that tend to work better as an analog instrument:
- Vocals – Unless you are adding subtle harmonies or short samples to spice up the composition, digital vocals usually sound terrible. Virtual instruments can’t replicate the raw energy of an analog vocalist singing into a microphone.
- Guitar – In my opinion, virtual instrument guitars usually come off sounding “fake.” Analog guitars exude a special tonal feature, as the strings slap against the guitar fretboard. Virtual Instruments fall flat on re-creating the analog guitar sound.
- Piano – The resonance inside a piano chamber shapes the piano’s sound. Virtual instruments can’t fully recreate this.
- Horns – Pick any horn instrument, and I’ll tell you it sounds better analog. The metal in each horn creates sound resonances that digital devices can’t mimic.
12. Let Your Style Flow
And finally. So many artists and producers try extremely hard to fit into a specific genre. It makes sense, and I’m not hating on it, but I’d argue it stifles a lot of raw creative power. Artists shape the genre; the genre doesn’t shape the artists.
Producers are pioneering new genres of music, and they do this by letting the creativity flow. Put pen to paper, or MIDI controller to DAW in this situation, and let the musical creativity flow. Whatever you listen to will influence your natural musical style.
What you input, you output. If you listen to a particular genre a lot, it will come out naturally in your composition. Let the nuances of the music come from you.
Everyone wants to hear something new. You could lead the next wave of musical genius. You just gotta be you.
That’s a Wrap for Music Production Tips
There are many more music production tips and tricks that’ll help you on your producing path, but these 13 secrets will get you on your way to you better-quality beats. They’re tiny details that add up to create a masterpiece song – worthy of any club, amphitheater, or other events.
Professionals with industry experience will agree with me. Where do you think I get this stuff from? ? Hone into the small details of the production process, and you’re on your way to being a top-tiered music producer!If any musical wizards are reading this, feel free to comment on other music production tips or secrets you think should be included. Let us know what you liked in the article and what you found valuable, or just click that like button if you loved it!
